Are you tired of spending a fortune on beauty products? Do you want to save some money while still looking fabulous? Look no further, because DIY beauty is here to save the day! In this article, we will explore three easy and fun ways to create your own beauty products at home: shellac nails, bath bombs, and makeup tips.
Shellac Nails
In recent years, the beauty industry has seen a rise in do-it-yourself (DIY) techniques for various treatments. From nail care to skincare, people are opting to pamper themselves at home rather than spending time and money at salons. Not only does this save money, but it also gives individuals the freedom to experiment and customize their beauty routines.
Shellac nails are a popular choice among those looking for long-lasting, glossy manicures. This type of polish is a hybrid between regular nail polish and gel polish, providing the best qualities of both. It offers a high-shine finish and can last up to two weeks without chipping. The best part? You can achieve this salon-quality result at home!
To get started with shellac nails, you will need a base coat, shellac polish of your choice, and a top coat. Begin by prepping your nails – file and shape them to your desired length and push back your cuticles. Then apply a thin layer of base coat and cure it under a UV or LED lamp according to the instructions on your polish. Next, apply two coats of your chosen shellac color, curing each layer under the lamp. Finish off with a top coat and cure one final time for a long-lasting, shiny finish.
Bath Bombs
Bath bombs have become a staple in self-care routines, providing a luxurious and relaxing experience at home. These fizzy balls are made with ingredients such as baking soda, citric acid, Epsom salt, and essential oils. When dropped into a warm bath, they dissolve and release the soothing aroma of essential oils while nourishing your skin.
Making bath bombs at home is simple and customizable. You can choose your preferred scent, and color, and even add in skin-loving ingredients like oatmeal or coconut oil. To make your own bath bombs, mix together baking soda, citric acid, Epsom salt, and any dry additives you desire. In a separate bowl, mix together essential oils and liquid ingredients such as water or witch hazel. Slowly add the liquid mixture to the dry ingredients, stirring until the mixture resembles wet sand. Press the mixture into a bath bomb mold and let it dry for 24 hours before using.
Eye Makeup Tips
- Prime Your Lids: Start with a clean base by applying a good eye primer. This will help your eyeshadow stay in place and intensify its color.
- Neutral Eyeshadow Base: If you’re going for a colorful look, use a neutral shade as a base to help the colors pop.
- Blend, Blend, Blend: To avoid harsh lines and achieve a professional finish, make sure to blend your eyeshadows properly.
- Eyeliner Tricks: For a more natural look, try tight-lining your upper lash line by applying liner on the inner rim of your eyelid.
- Curl Your Lashes: Curling your lashes can make a huge difference, giving an instant lift to your eyes.
- Mascara Tips: Always wiggle the mascara brush from the root to the tip of your lashes to ensure all lashes are coated and clump-free.
- Highlight the Inner Corner: Add a light, shimmery eyeshadow to the inner corner of your eyes to make them pop and appear more awake.
- Eyebrow Matters: Don’t forget to fill in your eyebrows as they frame your face and accentuate your eyes.
- Choose Right Colors: Choose eyeshadow colors that complement your eye color. For instance, bronze and gold shades look great on hazel or green eyes while blue eyes pop with peach or coral shades.
- Removing Eye Makeup: Always remove your eye makeup at the end of the day to keep your eyes healthy and prevent premature aging. Use a gentle makeup remover designed specifically for the delicate eye area.
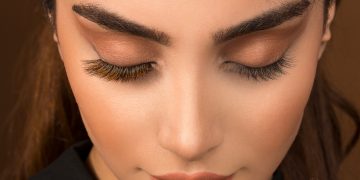
- Eyelash Extensions: Eyelash extensions are a great way to add volume, length, and thickness to your natural lashes. They’re applied individually to each lash using a special adhesive. The process can take around two hours for a full set, but the results are worth the patience. You can choose from different lengths, thicknesses, and curls to achieve your desired look. The extensions generally last for 2-3 weeks, but with proper care and regular touch-ups, they can last longer. Keep in mind that it’s best to have them applied by a professional to ensure they’re done correctly and safely. Lastly, always remember to avoid using oil-based products around your eyes, as they can weaken the adhesive and cause the extensions to fall out prematurely.
In conclusion, DIY beauty techniques like shellac nails, bath bombs, and eye makeup tips can empower you to take your beauty routine into your own hands. Not only can they save you time and money, but they also allow you the opportunity to customize your beauty treatments according to your specific needs and preferences. Furthermore, the act of creating your beauty products and treatments can be incredibly rewarding and fun! So, whether you’re a seasoned beauty enthusiast or a newbie, don’t be afraid to try these DIY beauty techniques and make them your own. You might be amazed by how much you can do yourself!


